Posted on
Tuesday, March 29, 2011
8:18 PM
| By:
Sheena and Seanna

Category:
side dish

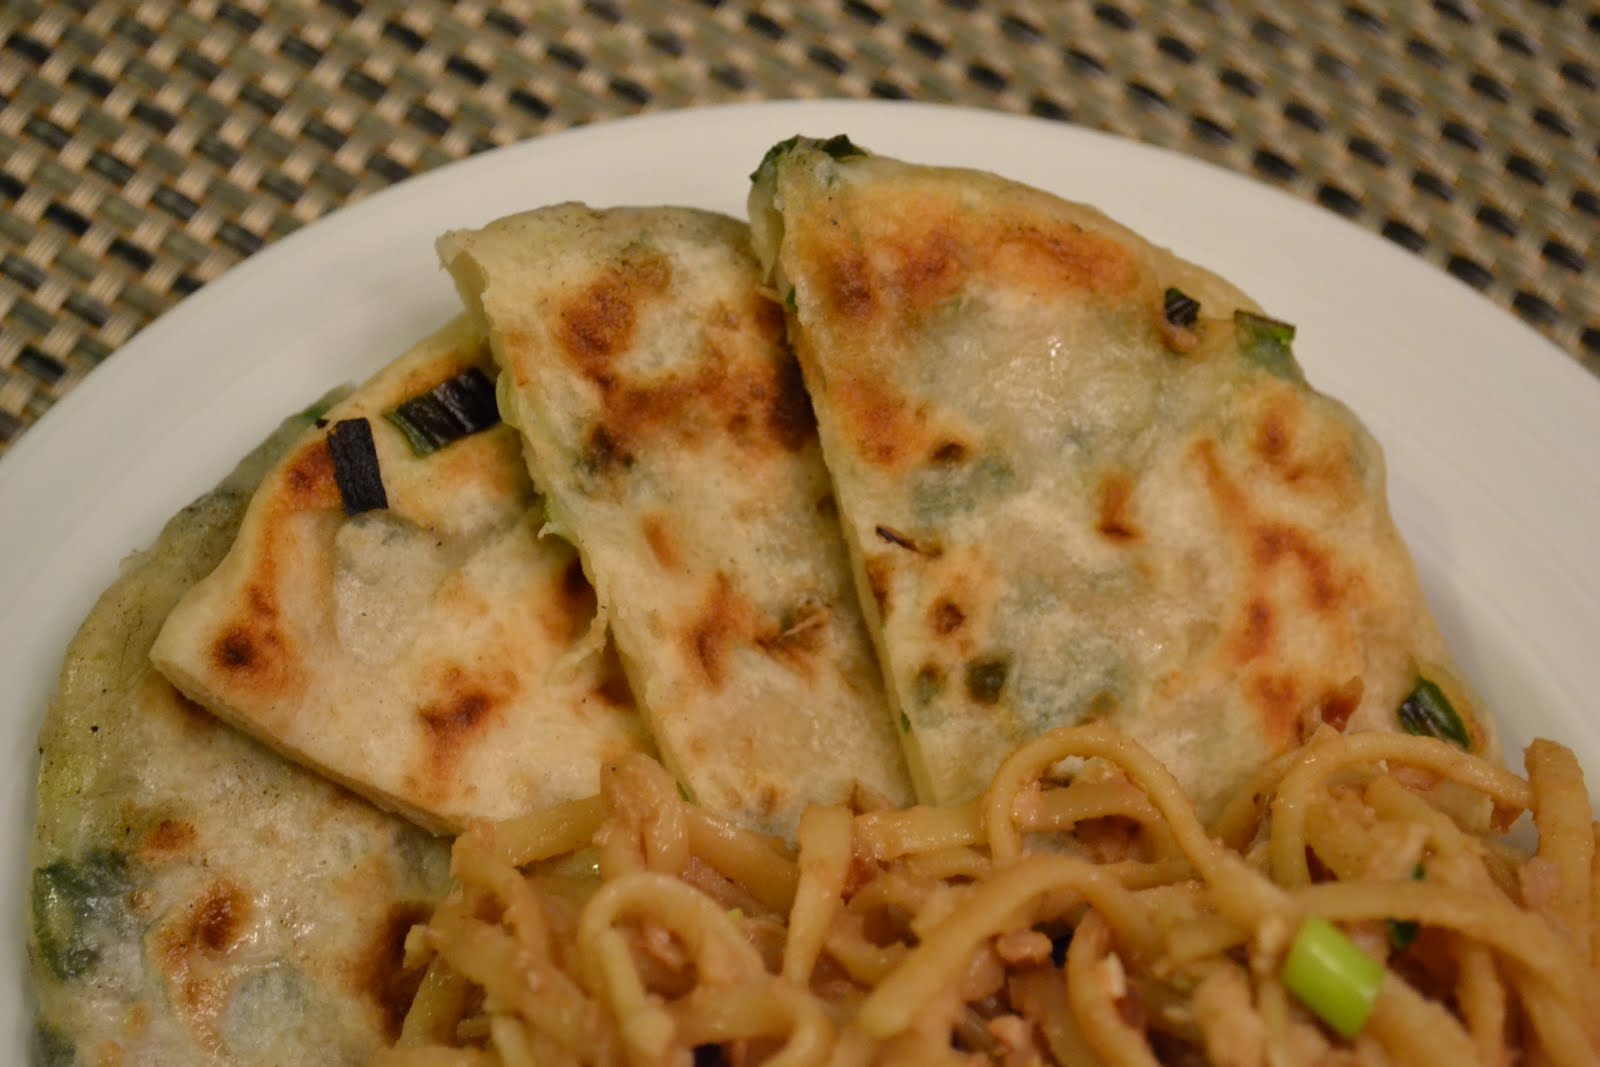
I made these last week to go with our Peanut Noodles and Chicken I blogged about last Tuesday. These were a great side dish for an Asian infused meal. Very tasty and original.
The only down side was they were a little messy to make and roll out but nothing about them was hard. I originally saw them in Family Fun Magazine back in February 2010. It was an article about cooking with kids and while I wouldn't recommend making them with kids they were still not advanced by any means.
Scallion Pancakes
3 Cups Flour
1/4 Teaspoon Salt
1 Cup Water, plus more for mixing
1/2 Cup Plus Two Tablespoons Vegetable Oil
1) In a large bowl, stir together the flour and salt then form the mixture into a mound. Make a well in the center and add the water, first filling the well, then pouring what remains around the sides of the bowl. Use a large spoon or rubber spatula to combine the ingredients into a soft, raggedy dough. If it doesn't pull together after about a minute of stirring, add water, one tablespoon at a time(up to 4), to help the dough take shape.
2) Turn out the dough onto a lightly floured surface and shape it into a ball. Working with floured hands, knead the dough until it's smooth and springy, about 2 to 3 minutes. Shape it back into a ball and set it aside to rest for 5 to 10 minutes.
3) While the dough rests chop the scallions then set aside.
4) Roll the dough into a log. Halve it crosswise, then cut each half into three pieces. Place five of the portions in a large bowl and cover it with a kitchen towel or plastic wrap.
5) Dust your hands and work surface with flour. Roll the sixth dough portion into a fairly round, 1/4 inch thick pancake. Spoon 1 tablespoon of the vegetable oil onto the dough and spread it evenly over the pancake. Scatter 2 generous tablespoons of chopped scallion on top, leaving a 1 inch border.
6) Roll the pancake into a log. Beginning at one end, wind the log into a spiral as if shaping a cinnamon roll, then tuck the loose end underneath. Use your palm to gently press the dough into a disk. Dust the dough lightly with flour, then roll it into a pancake 6 to 7 inches in diameter.
7) Warm a medium size skillet over medium high heat, then coat the pan with 1 1/2 teaspoons of vegetable oil. use a scallion slice to test the temperature of the oil. If it sizzles at once, the oil is ready for frying. If it doesn't , wait about 30 seconds and retest the oil with another scallion slice, repeating as necessary until the oil is hot.
8) Carefully lay the pancake in the skillet and fry it until its edges puff up and the bottom is golden brown, about 3 minutes. Flip the pancake, drizzle another 1/2 teaspoon of oil around the edges of the pan, and continue frying until the second side is golden brown, about 3 minutes m0re. Transfer the pancake to a serving plate.
9) Repeat Steps 5 through 8 for each remaining dough portion. Serve the pancakes hot or warm, cut into quarters or sixths.
Since some of these steps are a little hard to visualize so check out this link with pictures to Family Fun Magazine.
Enjoy!
Posted on
Wednesday, March 16, 2011
7:26 AM
| By:
Sheena and Seanna
Category:
bread
,
Rice
,
side dish

We had friends over for dinner on Saturday for a turkey that we smoked on the Traeger. It was amazing and so moist. If you have a Traeger grill I highly recommend trying a turkey on it. For me, however, the real star of the meal was the sides!
I made Garlic Cheese Rolls from Our Best Bites and Homemade Rice A Roni from Food Network Magazine.
First of all the Garlic Cheese Rolls were AMAZING! I had made them before but this time I didn't put them in a muffin tin like suggested. Instead I baked them in a 13x9" pan like cinnamon rolls. This kept the rolls softer and gooey in the center. My mouth waters just thinking of them. They came out of the oven about 20 minutes before the rest of the meal was ready and non of us could keep away from them. They ended up being appetizers as well as a side dish.
The Homemade Rice A Roni was also fantastic and so easy! I have now added it to "the binder" which means it is a new family favorite. I am always looking for side dish ideas and this was perfect. The recipe was from Food Network magazine but I am not sure which issue because I tore it out of the magazine to try. I love food network magazine and always find many things in every issue I want to try.

Homemade Rice A Roni (they call it Rice-Pasta Pilaf)
Toast 1/2 cup broken spaghetti in a pot over medium high heat with 2 tablespoons butter. Stir in 1 cup rice add 2 cups chicken broth, 1 cup water, 2 garlic cloves and 1 teaspoon salt. Boil for 3 minutes, then stir, cover and simmer 15 minutes. Let sit 5 minutes; fluff with a fork and smash the garlic. Stir in some butter and cilantro.
Posted on
Monday, September 27, 2010
8:15 PM
| By:
Sheena and Seanna
Category:
side dish

These are not the most beautiful things you will ever see but man are they good! My husband grew up eating them and when he saw all the zucchini growing in our garden he said we had to make zucchini pancakes. Since I had never heard of them he had to call his mom for the recipe. I am so glad he said we needed to make these. I think this is my new favorite way to prepare zucchini. Delicious!
The measurements for this are not exact. I know that is scary when it comes to a new recipe but trust me it is easy to figure out the amount you need. You are looking for a consistency that will hold some shape for making patties. If your zucchini is really watery you will need more flour and if it is less watery you may be able to get away with less. Even if they are not perfect they will still be AMAZING!
Zucchini Pancakes
1 Egg
4 Tablespoons Flour (+/-)
1/2 Onion Finely Chopped
3 Cups Shredded Zucchini
Seasoning Salt
Whip egg and then whisk in flour. Add the shredded zucchini and onion. At this point you can decide if you need more flour. After it is all mixed together form patties in your hand and set aside. Heat a thin layer of oil in a skillet. Once the oil is hot fry the zucchinis on each side until golden brown and crispy.
Once cooked, remove from the heat and sprinkle with seasoning salt.
Enjoy!

One of my favorite things to do with cucumbers this time of year is to make Onion Cucumber Salad. I grew up with my Grandma serving this at family gatherings and it always tastes very light and refreshing. A perfect side dish to almost any meal.
Since I don't have my Grandma's recipe I have always used the one in the 1964 Betty Crocker's New Dinner for Two cookbook. It makes a small recipe since the book is meant to provide meals for two but I usually just increase the amount. It tastes just like I remember.
Onion-Cucumber Salad
1/2 Cucumber
1/4 Medium Onion
1/4 Cup Vinegar
1/4 Cup Water
2 to 3 Teaspoons Sugar (I always use the higher number because I like sugar)
1/8 Teaspoon Salt
Dash of Pepper
Peel and thinly slice cucumber. Thinly slice onion, separating rings. Combine remaining ingredients. Pour over vegetable; marinate at least 1 hour.
Enjoy!
Posted on
Monday, August 9, 2010
8:48 PM
| By:
Sheena and Seanna
Category:
Pasta
,
side dish

Last week I decided to throw together a simple pasta salad to serve with our dinner. It turned out perfect and was super easy! I liked it so much I even ate leftovers the next day which I almost never do.
I was also happy about this side dish because it used up several items that had been lingering in my pantry and fridge.
There are no measurements with this recipe just add as much or as little as you like. Feel free to add other ingredients too-this is very flexible. Have fun!
Simple Pasta Salad
Orzo
Cucumber
Zucchini
Onion
Green Pepper
Avocado
Italian Dressing
Cook the orzo according to the packed directions. Drain, and run under cold water to cool quickly. Dice all remaining ingredients to desired size. Toss the cold orzo, veggies, and Italian dressing to taste. Chill until ready to eat.

We have fresh green beans right now growing in our garden!! I was excited to make them the way my Grandma makes them when we go to the beach in the summer. I tried to call to get her recipe but she was out and about. Bummer.
I turned to the next best thing, Food Network's website. I did a quick search and saw this recipe from Emeril Lagasse. It looked magnificent and had lots of great reviews.
I made it and all the reviews were right they were amazing. Probably not as healthy as they could be but amazing none the less.
Bacon Braised Green Beans
1 Tablespoon Olive Oil
6 Slices Bacon, diced
1 Cup Thinly Sliced Onion
2 Tablespoons Sliced Garlic
2 Pounds Green Beans
1 Cup Chicken Stock or Water
1 Teaspoon Salt
1/2 Teaspoon Pepper
Set a Dutch oven over medium heat and add the olive oil. Once the oil is hot, add the bacon and cook, stirring occasionally, until it is well browned, about 5 minutes. Add the onions and garlic and cook, stirring occasionally , until the onions are translucent, 3 to 4 minutes. Add the green beans and toss to combine with the bacon and onions.
Increase the heat to medium high and add the chicken stock. As soon as the stock begins to boil, place the lid on the pan and cook the beans for about 6 minutes. Remove the lid, season the beans with the salt and pepper, and toss well. Replace the lid and cook until the beans are tender, 1 or 2 minutes longer.
Remove from the heat and transfer the beans to a serving dish or small platter.
Posted on
Tuesday, July 27, 2010
5:00 PM
| By:
Sheena and Seanna
Category:
Appetizer
,
side dish

In September of 2009 I saw this recipe on Making Dough and thought I would have to try it sometime. I didn't realize "sometime" would be almost a year later!
I happened to have almost all the ingredients on Friday night and like it has been lately, the house was too hot to cook. I made a big batch for my husband and I. Together we ate the WHOLE BOWL!
It was so good and perfectly refreshing for a hot summer night. I am thinking of making it again this weekend and adding fresh pineapple. The great thing about this recipe is you can really experiment with anything that sounds good to you.
Perfect side dish, appetizer or if you are like us, a main dish!

Posted on
Thursday, May 13, 2010
7:18 AM
| By:
Sheena and Seanna
Category:
bread
,
corn
,
side dish

(Sorry for the less than amazing photo....this stuff just didn't want to be photographed.)
Do you ever eat at Chevy's? If so, you will know what I am talking about when I refer to the sweet little goodness of corny stuff that arrives with your meal. It is so good, moister than cornbread and sweeter too. I found this recipe for making it at home on All Recipes back in 2007. I have made it many times since then and we always love it. It is not going to look like cornbread when you take it out of the oven and the directions say to serve it with an ice cream scoop so don't be alarmed.
The only ingredient on the list that you may not have at your house already is Masa Harina. This is a corn flour that can be found at almost all grocery stores. I actually purchased my bag at Winco. It is worth the extra purchase just to make this delicious side dish.
Sweet Corn Tomalito from All Recipes
5 Tablespoons Margarine, softened
1/4 Cup Masa Harina
1/3 Cup White Sugar
1/2 Cup Water
2 Cups Frozen Whole-Kernel Corn,
thawed
1/2 Cup Cornmeal
1 Teaspoon Baking Powder
1/2 Teaspoon Salt
4 Teaspoons Milk
In a medium bowl, mix together the margarine, masa flour, and sugar until light and fluffy. In a food processor or blender, blend one cup of the corn kernels with the water and cornmeal just until smooth. Stir into the masa mixture. Mix in the remaining corn, baking powder, salt, and milk until the batter is smooth. Pour into an 8x8 inch glass baking dish.
I have changed how I cook it compared to the original recipe. I cover my 8x8 pan with foil and then place it in a 9x13 pan that is filled 1/3 of the way full with water. I put that whole pan into an oven heated to 350 degrees and bake for 50-60 minutes. Let cool ten minutes and use an ice cream scoop for easy removal from the pan.
Posted on
Wednesday, May 12, 2010
7:27 AM
| By:
Sheena and Seanna
Category:
Rice
,
side dish

For me whenever we make Mexican food for dinner I can never come up with a great side dish. Last week when we were having friends over for dinner I was going to serve tacos and was trying to figure out what to put with it. Flipping through my huge binder of recipes I stumbled upon this one from Family Fun October 2006.
The recipe is for Mexican Rice Salad. It looked so refreshing in the magazine I wanted to give it a shot. I am so happy I tried this! It was delicious and very fresh tasting. It even got the honor of being moved from my huge binder of recipes to my small binder of family favorites. I ended up serving it to another friend the next night and she loved it too. This is now my go to side dish for Mexican food night.
Mexican Rice Salad
Juice of 1 Lime (about 2 Tablespoons)
1/2 Cup Salsa
1/2 Cup Italian Dressing
4 Cups Cold Cooked Rice (Must be cold or it will make the salad gummy)
1 Cup Diced Red Bell Pepper
1 Cup Cooked Corn (I didn't have any of this but next time I will make sure I do)
1/2 Cup Chopped Green Onion
1/2 Cup Chopped Cilantro
Mix the lime juice, salsa, and salad dressing in a large bowl. Stir in the rice, bell pepper, corn, green onion, and cilantro. Cover and refrigerate up to 3 days.

I had a large bag of potatoes in my garage that was begging to be used. Since I didn't have potatoes on the menu plan every day this week I decided I needed to do something else with them.
I recently checked out the cookbook Don't Panic Dinner's in the Freezer from our library and was looking through it while laying in bed. I found two potato side dishes that sounded yummy so when I got home from my job I got to work in the kitchen.
I peeled half the potatoes to make Marvelous Mashed Potatoes and put the other half in the oven for Twice Baked Potatoes. Now I haven't reheated these to see what they taste like after being frozen but I did sample before putting them into the freezer and they were good! At the end of my cooking session I was happy that my potatoes didn't go to waste and I now had several meals worth of side dishes in my freezer.
Twice Baked Potatoes from Don't Panic Dinner's in the Freezer

6 Potatoes
Butter, for greasing
Salt
8 Ounces Cream Cheese
1/2 Cup Hot Milk
1 Tablespoon Onion Salt
2 Tablespoons Butter
1/2 Teaspoon Pepper
Paprika
Clean potatoes and dry. Grease potatoes with butter and salt the skins. Bake potatoes at 350 degrees for 1 hour. Remove from oven and cool until you are able to handle them. Cut potato in half lengthwise and scoop cooked potato out into mixing bowl, being careful to keep the skins whole. Mash potatoes with cream cheese, hot milk, onion salt, butter and pepper. Pile potato mixture back into skins. Sprinkle with paprika. Wrap potatoes individually in plastic wrap and freeze.
Serving Day
Thaw potatoes completely. Place in 350 degree oven and bake for 20 minutes or until heated through.
Marvelous Mashed Potatoes from Don't Panic Dinner's in the Freezer

4 Pounds Potatoes
1 Tablespoon Salt
1 1/2 Cups Milk
1/2 Cup Butter
Salt and Pepper
Peel potato and cut into quarters. Place potatoes in a large stockpot. Add enough water to cover potatoes plus 1 inch more. Stir in salt. Bring potatoes to a boil; reduce heat and simmer until potatoes are fork-tender, about 25-30 minutes.
Drain potatoes immediately and return to pan; cover to keep warm. Heat milk in saucepan until boiling. Mash potatoes with a potato masher or an electric mixer on low speed. Add butter, salt, pepper and enough hot milk to make potatoes smooth and creamy. Cool completely. Freeze in Ziploc bag.
Serving Day
Thaw potatoes completely. Place potato in an oven-proof dish and reheat at 350 degrees for 25 minutes or until heated through. Cover if necessary. Stir halfway through cooking time. Add just enough milk and or butter to bring potatoes back to a smooth, creamy consistency.
Posted on
Tuesday, February 16, 2010
6:08 PM
| By:
Sheena and Seanna
Category:
chicken
,
side dish


My husband and I spent our honeymoon on the beautiful island of Maui back in 2006. I can't believe we are already working on our 4th year of marriage. I guess time flies when you are having fun.
On our trip we ate at this place called the Aloha Mixed Plate. It was one of our favorite places so when we got home I tried to duplicate their mixed plate meal of teriyaki chicken, rice and fabulous macaroni salad. I think it has something to do with the cultural past of Hawaii that their mixed plates come with macaroni salad and rice. I know two starches together doesn't sound good but trust me in this meal they are amazing!
When I make a mixed plate at home I always have chicken, rice, macaroni salad, and grilled veggies. I added the grilled veggies to get a vegetable in the meal. The only thing that really takes a recipe is the macaroni salad. For the chicken I use a bottle of teriyaki sauce, marinate the chicken for a while and then we grill or bake it in the oven. My favorite sauce is Soy Vay Veri Veri Teriyaki.
Where the real winner of this meal comes in is the macaroni salad. I found this recipe somewhere online but I can't remember where. It is a perfect replica of our favorite Hawaiian side dish.
Hawaiian Macaroni Salad
Large Macaroni (my recipe doesn't have an amount but I usually use 2-2 1/2 cups)
1/4 Cup Grated Carrots
1 Cup Best Foods Mayonnaise (THIS IS A MUST)
1/4 Cup Milk
Salt and Pepper
Cook macaroni until tender. Add grated carrots, mayonnaise, and milk till well coated. Salt and pepper to taste.
So good! Enjoy your Hawaiian dinner!
Posted on
Thursday, February 11, 2010
5:05 PM
| By:
Sheena and Seanna
Category:
Rice
,
side dish

Right there in the center of our Mexican Pizza is the success of an experiment from last night. On my menu plan I had written Spanish Rice but I didn't have the ingredients on hand to make my usual version. What I did have was brown minute rice and many cans of tomatoes from a recent sale in town.
All of a sudden I had an ah ha moment and went with it. What I did was drain all the liquid from a can of diced tomatoes with chilies into a liquid measuring cup. I had about 3/4 cup of tomato juice and added enough water to get 1 cup. I brought the liquid to a boil in a small saucepan and added 1 cup of Minute Rice.
To cook I followed the package directions which was to cover and let simmer for 5 minutes then remove from the heat, stir, cover and let sit another 5 minutes. Once it was all ready to go I stirred in a couple scoops of the diced tomatoes.
The end result was spectacular and I am still in shock over how easy it was. If you are in a pinch and need a great side dish give this one a try.
Posted on
Monday, November 23, 2009
10:01 PM
| By:
Sheena and Seanna
Category:
side dish

Time for one of my favorite super easy holiday season side dishes. I got this from kraftfoods.com back in 2007 but I have seen various versions of it floating around the internet and magazines. I love it for several reasons 1) I love Jello! 2) I love how refreshing it is 3) it is so easy! I prepared this last week to go with the roasted chicken I made for my Grandparents and everyone (well maybe not my husband since he doesn't like cranberries) loved it.
Festive Cranberry-Pineapple Salad
1 Can (20 oz) crushed pineapple, undrained
2 Pkg. (4-serving size each) or 1 pkg. (8-serving size) raspberry jello
1 Can (16 oz) whole berry cranberry sauce
1 Medium apple, chopped
Drain pineapple, reserving liquid in 1 qt liquid measuring cup. Add enough cold water to reserved liquid to measure 3 cups; pour into large saucepan. Bring to boil; remove from heat. Add gelatin; stir at least 2 minutes until completely dissolved. Add cranberry sauce; stir until well blended. Pour into large bowl. Refrigerate 1 1/2 hours or until slightly thickened.
Stir in remaining pineapple and apples. Stir gently until wll blended.
Refrigerate 4 hours or until firm.
Eat and enjoy! This is my favorite side dish for the Bloggy Progressive Dinner.
Posted on
Sunday, November 1, 2009
10:19 PM
| By:
Sheena and Seanna
Category:
carrots
,
side dish
I have never really liked cooked carrots until the day I tried this recipe. It is super simple and adds just enough glaze to the carrots to make them special. If you are lacking a side dish this week give these carrots a try.
Glazed Carrots from Betty Crocker's Dinner for Two Cookbook
4 Medium Carrots
1/4 Cup Sugar
1 Tablespoon Butter
2 Teaspoons Carrot Liquid
Wash and scrape carrots (I used baby carrots so I skipped this part and the next). Slice carrots lengthwise. Cook, covered in small amount of boiling salted water 10 to 15 minutes, until tender. Drain and reserve 2 tsp. liquid. In skillet, heat sugar, butter, and carrot liquid until blended. Add carrots and heat 8 to 10 minutes until glazed and lightly browned.


Posted on
Thursday, October 22, 2009
8:04 PM
| By:
Sheena and Seanna
Category:
Pasta
,
side dish
I saw this recipe in the October 2009 issue of the Food Network Magazine and I knew I had to try it. If you know me, you know I love anything in the carbohydrate family. Thus spaetzle fits perfectly into my preferred food group.
I have to say this recipe sounded so much easier when I was reading it and it was super easy making it until I got to the part where it says "push dough through a colander with a rubber spatula." Easier said than done since I didn't anticipate the boiling hot steam killing my hands as I tried to push it through. So now I have this on my Christmas wish list the Jumbo Stainless Steel Potato Ricer.
After the pain of pushing this dough through my colander we did end up with delicious spaetzle and no leftovers-good sign!
Homemade Spaetzle
3 Cups all-purpose flour
2 Large eggs
Kosher salt
4 Tablespoons unsalted butter; 2 tablespoons melted
Freshly ground pepper
Chopped fresh parsley

Mix the flour, eggs and a pinch of salt in a bowl, then gradually sitr in up to 1 cup water to make a smooth, batter-like dough. Beat with a wooden spoon until bubbles form, then sitr in the melted butter.

Bring a large saucepan of salted water to a boil. Place about 1 cup of the dough in a colander with large holes; use a rubber spatula (and a lot of arm muscle with determination!) to push the dough through the holes and into the boiling water. (Or use a spaetzle press they say...good suggestion there.) Cook for about 1 minute after the spaetzle float to the surface, then transfer with a slotted spoon to another colander. Repeat with the remaining dough. Rinse the spaetzle in cold waer if not serving immediately and set aside.
Before serving, saute the spaetzle in a skillet with the remaining 2 tablespoons butter until warmed through. Season with pepper and garnish with parsley. Worth the work if you love carbs-oh so yummy!